Here's a cool fly using UV Knot Sense. I've been considering getting some Clear Cure Goo lately and seeing different ways to use a product like that gets me one step closer to laying down the cash to get some!
The Banksia Bug
Thursday, April 28, 2011
Monday, April 25, 2011
Moms Taxi Get's Pimped
A friend of mine sent this picture of her minivan all decked out in a Guys, Flies & Pies sticker!
Get your taxi pimped now!
Get your taxi pimped now!
 |
| I might discourage off road fishing trips in the minivan |
Thursday, April 21, 2011
This Is Not Spring!
Back in late March when the news started reporting that it was spring, I didn't buy into it. Sure, technically it was spring, but in my mind it isn't spring until at least April. So, mentally I prepared myself not to believe the hype about spring in March, and to wait it out until April. But, now that it's April 21st I'm starting to think it's never going to show up here in NY.
Sure, we had a few days that went above 50....60....and one day I think went to 70, but those were single days, and not a long stretch. We had fake spring like days before during the official winter. I'm getting darn close to giving up on spring. Seriously, I cut it some slack in March, knowing it was too much to expect out of nature, but now it's time to live up to the hype.
I'm seeing photos online of our southern friends hitting the water in great looking conditions. This week great conditions would simply consist of NO WIND!
Is it really too much to ask for a consistent run of 60 degree days? I'm not being pushy and asking Mother Nature for 70's, I'd just like 60's CONSISTANTLY to start with. I'll even give up the night, an let the temps dip into the mid 40's, but daytime highs of 60's.....oh, and some sun...would be nice!
I've got poppers to fish and bluegill to harass. See, I'm even being nice and realizing it's too early to expect much from the bass!
Is it too much to ask for weather that brings up fish like this?
 |
| 18 inches of bass from July 2010 |
Wednesday, April 20, 2011
Jim's Travel Fly Tying Box
A few weeks ago when I was tying at the FFAA show in Utica I was able to check out this sweet box made by my friend Jim.
It fit's together into a nice portable box, but opens up to find a vise and materials. Jim says that it's very handy to take on the road for business or fishing trips. He's known for running back to the truck then coming back to the water with a fresh tied fly.
It fit's together into a nice portable box, but opens up to find a vise and materials. Jim says that it's very handy to take on the road for business or fishing trips. He's known for running back to the truck then coming back to the water with a fresh tied fly.
 |
| All Closed Up |
 |
| Opened |
 |
| Setup |
Sunday, April 17, 2011
Abel Belt Buckles and Flashlights
You might remember my post about the Abel Nippers, or the update showing new colors, and how pricey they were. Well, I've given you enough time to build back up the balance in your checking account....so here it is.
Abel now offers a belt ($100) and belt buckles ($150), or both for a steal at $225.
Sure, you can find other belts out there for about this price, but they usually are meant to keep up more than just a pair of "corduroy trousers". For the price of others online they hold up stuff like handcuffs, guns, tazers, and pepper spray. Things that can come in handy when someone tries to take your fishing hole.
But, to be fair....if these were only $25 I'd be all over buying one!
Now, let's say you have one of those fancy belts that holds up more than your corduroys...then maybe you have a spot for the $250 flashlight.
But, to be fair again, if these were $30 I'd be all over buying one! At $250 I'd hope they'd still work after I bust out a window as my car starts to sink into the lake....and still be bright enough to lead the way back to the main road.
Abel now offers a belt ($100) and belt buckles ($150), or both for a steal at $225.
 |
| Keep your pants on! |
But, to be fair....if these were only $25 I'd be all over buying one!
Now, let's say you have one of those fancy belts that holds up more than your corduroys...then maybe you have a spot for the $250 flashlight.
 |
| Light it up! |
But, to be fair again, if these were $30 I'd be all over buying one! At $250 I'd hope they'd still work after I bust out a window as my car starts to sink into the lake....and still be bright enough to lead the way back to the main road.
Wednesday, April 13, 2011
How I Made My Copic Air Can Refillable
I like the Copic airbrush I bought recently, but the idea of having to drop $12 each time my can of air runs out, or buying an air compressor, just isn't that appealing to me. So, I tried to make the original can I bought refillable.
This photo shows what my original $50 investment got me. 1 D60 can of compressed air, one grip, and 4 markers.

Disclaimer: Many reviews of similar ideas done to other canned products online shows that this might be dangerous, so I'm telling you here to not do this at home, school, church, or the river.....do this at your friends home!
My wife and I thought it would likely be possible to fill the can with a bike pump. First I had to get a valve into the can so I could have a hole into the can.
I decided the cut the valve out of an old soccer ball and use that in my can. Using a razor blade I cut the piece out around the valve, then cut the valve out of the air bladder.
At this point I wanted to see the inside of the valve as it was in use so I put the inflation needle into it and showed it off to the kids so they could learn how it worked.
Then I took the empty can to work and asked my friend Dave to drill a hole in the bottom. This hole had to be bigger than any drill bit I had so it could accommodate the valve I stole from the soccer ball.
I decided to wash out the inside of the can to remove any dust or metal filings from the drilling. I heard that water inside the can might cause rust so I dried it out in the sun and used a hair dryer. However, moisture in the air that I plan to put inside the can might cause rust in the end anyway. We'll see.
After it was cleaned I roughed up the can and valve with sandpaper and used JB Weld to seal it shut.
I let this sit for almost 24 hours before I tested it by filling it with air.
I inserted the inflation needle to test it. Removed it and put it inside a laundry basket.
The reason I put it in the laundry basket, through the side, was in case the thing blew up, the hose would be restricted in it's movement, and the blanket would hopefully absorb most of the shrapnel.
After I pumped it up with one pump of my floor stand bike pump (measuring about 20psi) I removed it from the needle, resulting in a little air release sound....likely from the hose, not the can.
I loaded the airbrush with my black marker and gave it a test spray. You can see the black mist in the image below.
Pumping it once, to 20psi, gave me about 5 seconds of spray. Not that much spray time. Since the official air compressor setup can Copic sells states to set the air compressor for 30-40psi I thought it was safest to stay in that range, or under it. So, I pumped it twice and got just a little over 40psi into the can.
With about 40psi I got about 8 seconds of spray time. Still not any remarkable length of spray, but workable for sure.
Only getting about 8 seconds of air out of each fill of the can, I thought I could just keep the needle in the can, and the pump going. My very eager to help (at least this time) 4 year old son started pumping and providing a much more constant stream of air. He couldn't pump it too well, so there was no concern of going past the tested 40psi. Since there was no concern of running out of air, I often took the marker out and ran it with just air to help quickly dry the popper before the next color.
I found on 2 pumps, 40psi, I could paint around the whole popper. When changing markers I pumped it again, even if some air was left.
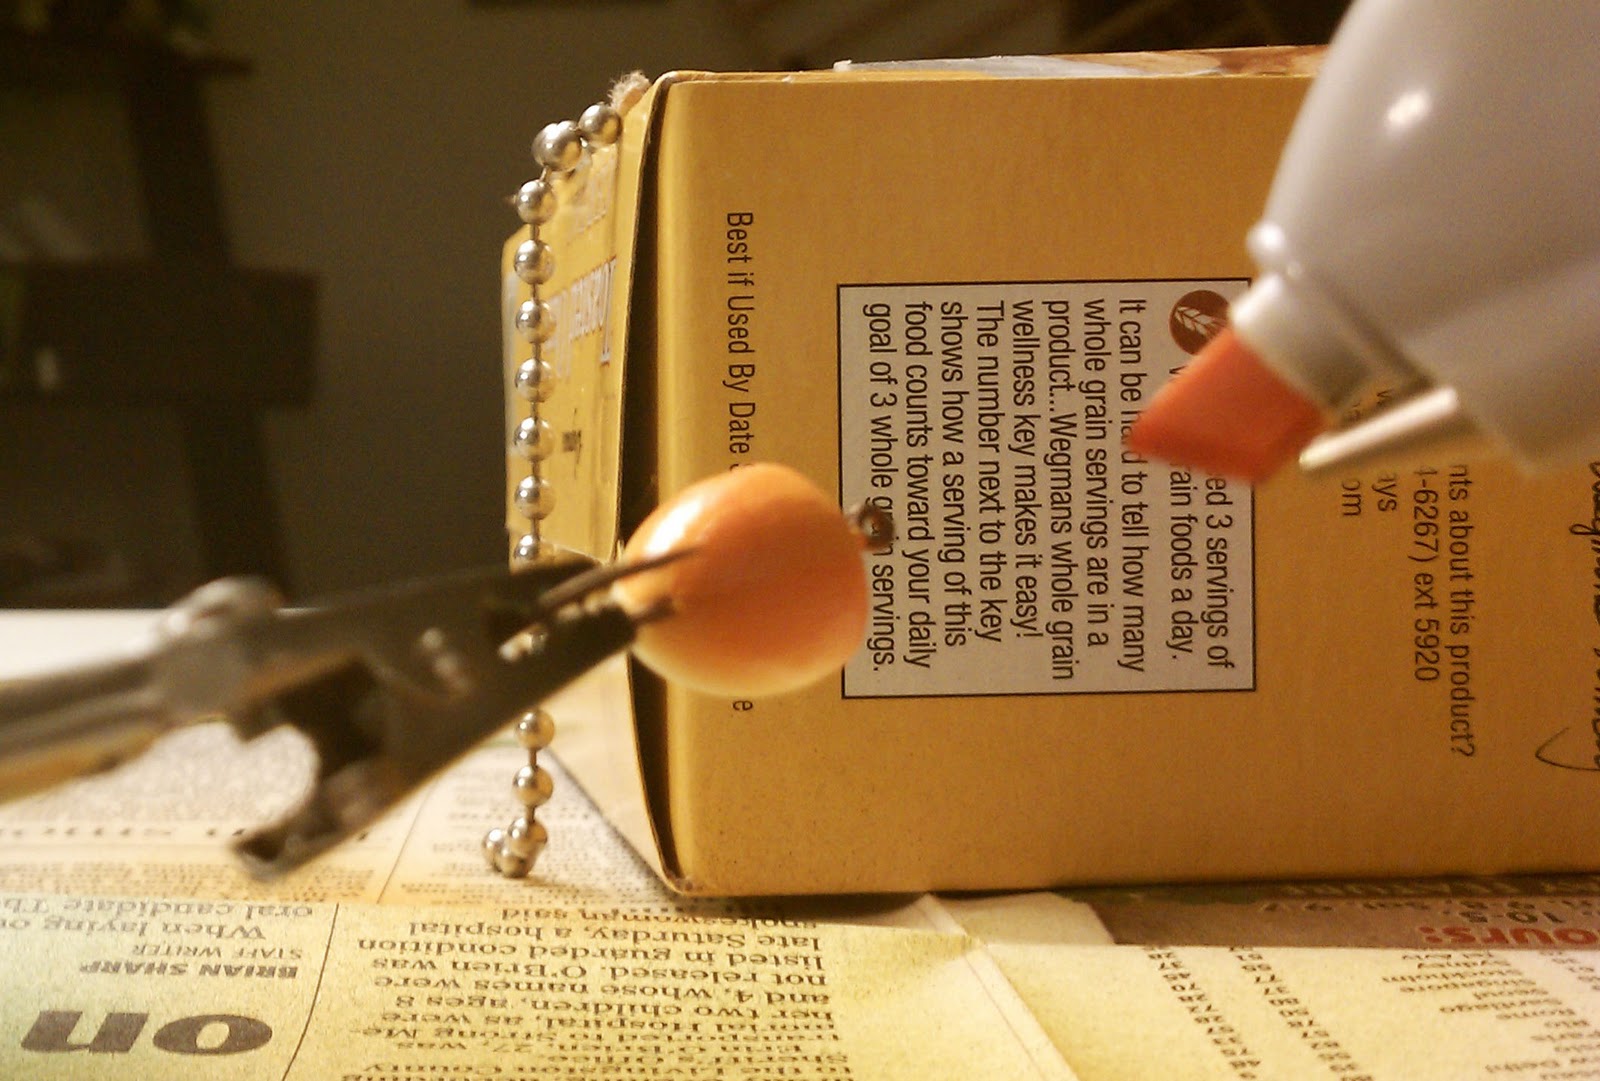
After testing the setup, and being extremely pleased with the results, it was time to paint the rest of my poppers. I was able to paint about 25 with the original air in the can, so I painted the remaining 25 with the bike pump system. Here are some of the favorites from the night.
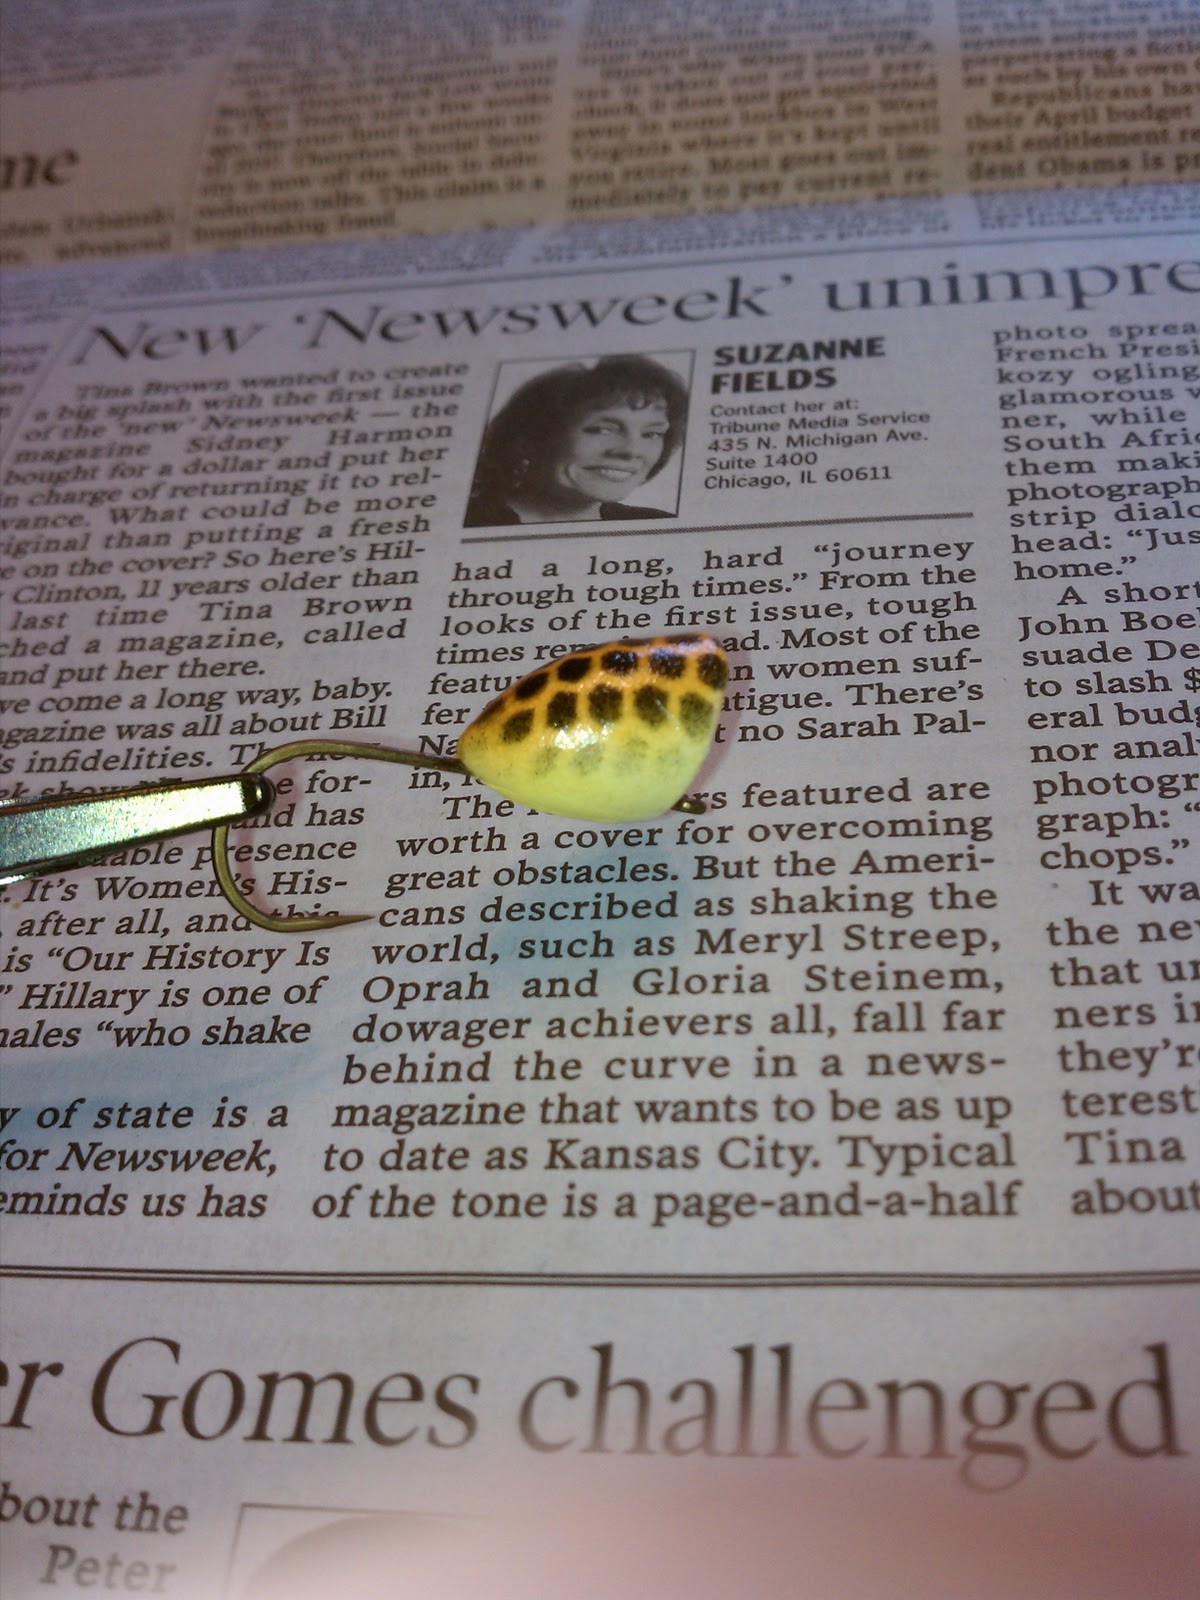
I got the spots on these by wrapping the popper with some fish net material from my wife's fabric stash. You simple wrap it up and spray through it. Keep in mind, if you pull too tightly on the fish net it will stretch and give you a slightly different shape.
Next up, eyes, epoxy, feathers and legs!
This photo shows what my original $50 investment got me. 1 D60 can of compressed air, one grip, and 4 markers.

Disclaimer: Many reviews of similar ideas done to other canned products online shows that this might be dangerous, so I'm telling you here to not do this at home, school, church, or the river.....do this at your friends home!
My wife and I thought it would likely be possible to fill the can with a bike pump. First I had to get a valve into the can so I could have a hole into the can.
I decided the cut the valve out of an old soccer ball and use that in my can. Using a razor blade I cut the piece out around the valve, then cut the valve out of the air bladder.
 |
| Cut the piece first |
 |
| The valve before it was completely removed. |
 |
| Trimmed up the edges. |
 |
| Clear through |
 |
| The can's hole and soccer air valve |
I decided to wash out the inside of the can to remove any dust or metal filings from the drilling. I heard that water inside the can might cause rust so I dried it out in the sun and used a hair dryer. However, moisture in the air that I plan to put inside the can might cause rust in the end anyway. We'll see.
After it was cleaned I roughed up the can and valve with sandpaper and used JB Weld to seal it shut.
 |
| Ready to mix the two parts |
 |
| Applied some to the inside of the valve |
 |
| Applied some to the can |
 |
| The squeeze out |
 |
| Cleaned up the squeeze out |
 |
| Bike pump and refillable can |
I inserted the inflation needle to test it. Removed it and put it inside a laundry basket.
 |
| Inserting the inflation needle |
 |
| Laundry basket testing safety system. Patent Pending. |
 |
| 1 pump = 20psi |
 |
| My first proof that it worked!!! |
 |
| 2 pumps = 40psi |
 |
| Some of my kids initials for the test |
 |
| Putting the kid to work! |
 |
| My first bike pump popper |
 |
| I see frogs in my future |
Next up, eyes, epoxy, feathers and legs!
Tuesday, April 12, 2011
The Spring Hike
Without planning, and without much thought, every year we seem to take our first hike of the year at the same local park. It's a nice place because there is a playground for the kids to run around after the hike.
This area is of interest to me, because it was about 20 years ago when I first saw some fat brown trout and steelhead in there. Of course, this then reminds me of my good friend who 20 years ago caught 2 of them with a net and shot them with a BB gun. We were young, and he was immature. Thankfully, he learned his lesson....and after shooting ME with a BB gun, he's given up shooting things at random......but, back to the hike.
The hike is only .5 miles round trip, and just right for kids that are wanting to go back and play.
We stopped at the creek, where my wife spotted a fruit bowl, and sent my son down to check it out. It was in one piece, and she took it home....but left the orange he found. We have seen salmon in here in the past, but didn't see anything this time.
The kids had fun jumping the few trickles we had to cross, and looking for deer tracks.
The farthest point of the hike was an unused rail road track. The kids had fun balancing on the tracks and exploring.
We headed back to the playground and found evidence of gang activity.....a LOADED magazine. I did what any responsible citizen would do.....I left it on the picnic bench.
We got muddy and had a great time. I bet somehow, next year, without planning, we'll end up hiking that same trail and looking for more fish in the creek.
This area is of interest to me, because it was about 20 years ago when I first saw some fat brown trout and steelhead in there. Of course, this then reminds me of my good friend who 20 years ago caught 2 of them with a net and shot them with a BB gun. We were young, and he was immature. Thankfully, he learned his lesson....and after shooting ME with a BB gun, he's given up shooting things at random......but, back to the hike.
The hike is only .5 miles round trip, and just right for kids that are wanting to go back and play.
We stopped at the creek, where my wife spotted a fruit bowl, and sent my son down to check it out. It was in one piece, and she took it home....but left the orange he found. We have seen salmon in here in the past, but didn't see anything this time.
 |
| A dish, no fish |
 |
| Jump! |
 |
| LOOK! A DEER! |
 |
| Kids exploring |
 | ||
| Lock and Load |
We got muddy and had a great time. I bet somehow, next year, without planning, we'll end up hiking that same trail and looking for more fish in the creek.
Monday, April 11, 2011
A Bass Popper Painted With The Copic Airbrush
I had a chance over the weekend to take a few minutes and a few popper heads and tie some tails on them. My wife snapped these photos on her cell phone.
This fly is the first popper I've ever poked rubber legs through. I love the look of legs and it was nice to give it a try. I'll definitely be adding more legs to more poppers.
I keep telling my kids "a few more weeks and this water will be on fire!" ....and then those poppers I've been tying will be put to the test!
 |
| "Tying" the legs on |
 |
| Bass-o-matic |
We were able to convince my parents to watch the kids and my wife and I got out and fished for about an hour. My first fish of the day was this monster! I'm also sporting the The Fish Fighter Mini-Foam Fly Clip, which is a great place to let your flies dry before they go back in the box!
 |
| You're jealous! |
Saturday, April 9, 2011
Copic Airbrush and Fly Tying
After seeing other posts online about using a Copic airbrush to paint poppers I thought I'd have to try it myself.
First - The Copic airbrush is a system that uses markers as an ink source, and this allows the changing of colors to take literally only a few seconds. Clean up of the system is likely not necessary, and I've done nothing to clean mine yet.
It comes in a few setup ups. I got the one with the grip and an air can. Other setups are available with a grip and a can (without compressed air in it) that can connect to your own hose and air compressor. A third setup comes with the grip, the can to connect to a compressor and the hose and a base to hold up the can when not in use.
Of course the cans of compressed air have a time limit to their use. Mine is rated to have about 7 minutes of continuous air. If you connect it to your own air compressor then your air supply is unlimited.
My investment consisted of the grip and air can and 4 markers. At a local art supply store I bought all these items for about $50.
First I had to super glue the hooks to the popper head. Then I put some Elmer's wood filler in the slot. I did most of them first, then remembered I had heard that thinning the wood filler with water worked well. I did that and found it much easier to push it into the slot than when it wasn't thinned.
After the wood filler dried I took a nail file and sanded it smooth.
Next, I painted the bottom of the popper white. This covers the wood filler and gives an even white color if you want to leave it white on the belly.
Now comes the Copic airbrush. This isn't too hard to use. I just load up the first marker and hold it back a few inches from the popper and make short bursts with the air. Just like spray paint, if you hold it in one spot too long it will get darker and even build up to the point where it will drip.
I typically do the lighter color on the bottom first, then a darker color on top second.
Using a piece of fish net material (raid your wife's fabric supply) you can make a nice patter by spraying through it.

Once I'm satisfied with the airbrush results, I switch to another source for color. I use markers or acrylic paint to make eyes and other patterns on the popper.
I put the eyes on in 3 steps. First I put black, let it dry, put a smaller white dot, let that dry, then finally a smaller black dot, and let that dry. I use the back end of drill bits for different sizes. I found that dipping the bit into the paint to get a drop on the end, then gently pressing that drop on the popper slowly works best. I don't really try to get the bit to touch the popper, but let the paint spread out gently, which it does uniformly. I found trying to rock the bit back and forth to get it to touch the rounded edge of the popper resulted in poor results. Letting the drop just press itself out worked well and gave good round results.
After I'm done painting the bodies I put on some 5 minute epoxy to help protect all the work and provide some durability while fishing. Next up, feathers to decorate the tail end!
Overall I'm really please with both the Copic Airbrush and the eyes. Many people that have seen these have asked me if you can use other markers. I do believe that I saw somewhere on the internet where someone said there was another brand of marker you could use, but I don't remember that source. The grip that holds all the stuff together does have a specific shape and size, so the marker has to fit. I did hold a different marker outside of the grip, and it did blow the ink out....so there is some potential. I think having the marker fit into the grip would be the easiest approach. I'd be interested to hear if anyone has success with other (cheaper) markers.
Stay tuned to learn how to get more out of your can of air. Coming soon!
First - The Copic airbrush is a system that uses markers as an ink source, and this allows the changing of colors to take literally only a few seconds. Clean up of the system is likely not necessary, and I've done nothing to clean mine yet.
It comes in a few setup ups. I got the one with the grip and an air can. Other setups are available with a grip and a can (without compressed air in it) that can connect to your own hose and air compressor. A third setup comes with the grip, the can to connect to a compressor and the hose and a base to hold up the can when not in use.
Of course the cans of compressed air have a time limit to their use. Mine is rated to have about 7 minutes of continuous air. If you connect it to your own air compressor then your air supply is unlimited.
My investment consisted of the grip and air can and 4 markers. At a local art supply store I bought all these items for about $50.
 |
| 1 Grip + 1 Can + 4 Markers = $50 |
First I had to super glue the hooks to the popper head. Then I put some Elmer's wood filler in the slot. I did most of them first, then remembered I had heard that thinning the wood filler with water worked well. I did that and found it much easier to push it into the slot than when it wasn't thinned.
 |
| Glue hooks to heads |
 |
| Glued |
After the wood filler dried I took a nail file and sanded it smooth.
 |
| Top hook slot filled. Bottom hook slot sanded. |
Next, I painted the bottom of the popper white. This covers the wood filler and gives an even white color if you want to leave it white on the belly.
Now comes the Copic airbrush. This isn't too hard to use. I just load up the first marker and hold it back a few inches from the popper and make short bursts with the air. Just like spray paint, if you hold it in one spot too long it will get darker and even build up to the point where it will drip.
 |
| Light colors first |
 |
| Dark colors second |
Once I'm satisfied with the airbrush results, I switch to another source for color. I use markers or acrylic paint to make eyes and other patterns on the popper.
I put the eyes on in 3 steps. First I put black, let it dry, put a smaller white dot, let that dry, then finally a smaller black dot, and let that dry. I use the back end of drill bits for different sizes. I found that dipping the bit into the paint to get a drop on the end, then gently pressing that drop on the popper slowly works best. I don't really try to get the bit to touch the popper, but let the paint spread out gently, which it does uniformly. I found trying to rock the bit back and forth to get it to touch the rounded edge of the popper resulted in poor results. Letting the drop just press itself out worked well and gave good round results.
 |
| First black drop |
 |
| Second drop in white |
 |
| Third drop in black. A group of poppers just hanging out. |
 |
| A few more details put on with a marker |
Overall I'm really please with both the Copic Airbrush and the eyes. Many people that have seen these have asked me if you can use other markers. I do believe that I saw somewhere on the internet where someone said there was another brand of marker you could use, but I don't remember that source. The grip that holds all the stuff together does have a specific shape and size, so the marker has to fit. I did hold a different marker outside of the grip, and it did blow the ink out....so there is some potential. I think having the marker fit into the grip would be the easiest approach. I'd be interested to hear if anyone has success with other (cheaper) markers.
Stay tuned to learn how to get more out of your can of air. Coming soon!
Monday, April 4, 2011
GFP on a Jeep
I got an email from a friend this past weekend. He sent along this picture showing his new Guys, Flies & Pies sticker on the back of his jeep.
If you want to purchase one for your car hit the "Get Your Shirt" link at the top of the page.
And don't forget to order your GFP t-shirt soon. I'll be taking orders until about the middle of April.
If you want to purchase one for your car hit the "Get Your Shirt" link at the top of the page.
And don't forget to order your GFP t-shirt soon. I'll be taking orders until about the middle of April.

Published with Blogger-droid v1.6.8
Saturday, April 2, 2011

First Bass of 2011
My 8 year old son and I got out fishing today. The wind was much stronger than I would have preferred. We started off at a place I call Twin Rock. In past years this pond has offered up many bass and a bluegill that is massive. With the wind today casting was challenging with my 5 weight.
After working one spot for a few minutes with no luck, we headed down the shoreline. My son climbed up on one of the twin rocks and tried his best before giving up to throw rocks. I kept casting into the wind. It eventualy paid off. I caught a massive bass that almost made my rod bend.
Posting this from my phone for the first time, and the photo won't post. I'll try to post it later.
Subscribe to:
Posts (Atom)